Monday, November 26, 2007

how I illustrate a book

I have not been posting much lately because I have been busy illustrating a little educational book. Remember that little fairy drawing I posted a few weeks ago? Well this is the book she appears in. I have done several of these books in the past, so I now have my game plan down on them. To make up for a lack of posting recently, I thought I would take you through the steps I use in illustrating these books. Hang on... here we go!

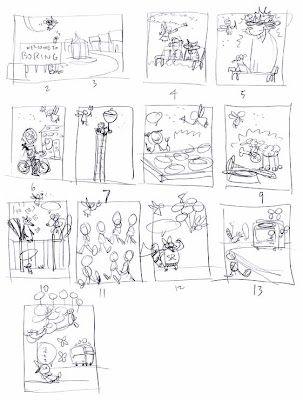
The first thing I do is read through the book and make a little thumbnail diagram of it. These are just doodles where I try to get an idea of what characters are on a page and what they are doing. (click to enlarge)

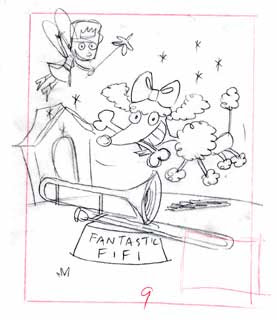
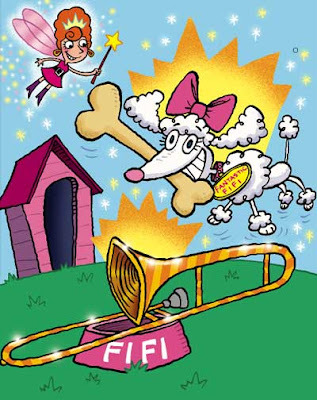
I think I will focus on page 9 as an example of my process. Page 9 has a poodle with a bone in her mouth and a striped trombone in her dish. These were put there by the fairy. I played a trombone in high school so I know how to fake a trombone pretty well. I think I draw a trombone better than I could play one. :0) So... I set around with lots of laser paper and a mechanical pencil and try to draw all the characters in the book. This takes a while, and usually happens in the evening while I "watch" whatever is on TV. TV is actuall a radio to me... I am pretty good at ignoring the picture and just listening. After lots and lots of doodling, I sort through all the sketches, find the poodles, and do a small but accurate drawing of the page.

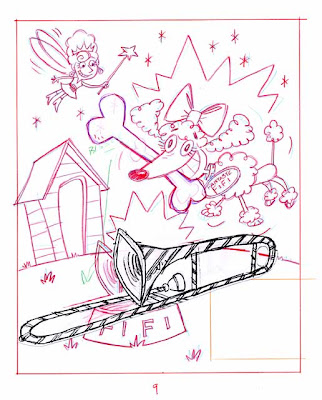
After I have worked out the drawings for all the pages, I then blow them all up to actual size. A few adjustments are made along the way, like I decided to turn the trombone around so the slide won't be covered up by a block of text that will appear in a box in the lower right corner. All the sketches are e-mailed as JPEGs and I wait for the inevitable corrections to come back. Usually they are not too bad and often are improvements to what I have done. On this page the suggestion was to make the bone and trombone larger. I erased (as you can see) the bone and made it bigger, but on the trombone I enlarged the sketch on my copy machine, cut out the larger version, and taped it down. (click to enlarge)

The drawing stage usually takes about a week for me to do. This is 14 pages. After approval of sketches I go to the second stage wich is inking, scanning and coloring. This part takes another week. For inking, I put a sheet of vellum over the sketch and make an inked drawing with a crow quill dip pen. Old school. :0)
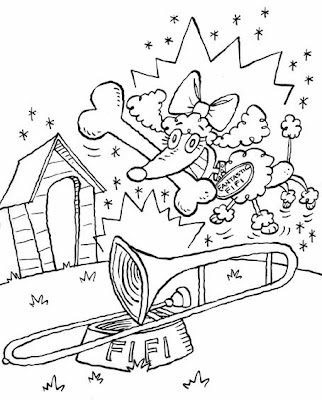

After all sketches are inked, I scan them as line art and color them with Photoshop 7. I refuse to upgrade. :0) I know just enough about Photoshop to be able to add color and create a few special effects. Color adds SO much to a drawing! Well, that's it! One book down... two more are waiting for me to do. One is due before Christmas and the other is due in early January. If you would like to see a step by step tutorial of how I color using Photoshop, just click on the "Photoshop tutorial" link under LABELS on my side bar. Thanks for stoppin by!
Friday, November 16, 2007

Jeepers!

Jeepers! I have been busy with stuff and haven't posted anything lately. I thought I should put something new up just so you will know I am still alive and kickin'. I spotted this little doodle for a book I am working on and decided ... that's good enough for now. Hopefully something else will follow soon.

Tuesday, November 06, 2007

HATS


For Illustration Friday this week I came up with a little limerick that I liked. That's the good news. The bad news is... I don't have the time to do a decent illustration for it. After taking a look at what is now appearing on JONESAPALOOZA, I decided that everything was looking the same. SO... for a change of pace, I grabbed my Wacom tablet and tried to draw on it. I don't think I have ever set it up to draw on, and this is the first time I have tried this. I don't consider the results anything more than a doodle with color, but it is going to have to do for this week. Anyhoo, I think I found my loose side. :0)

Thursday, November 01, 2007

fairy


Well, I am busy illustrating another little educational book. The finished art is due the middle of November. That's not far away. Christmas is just around the corner. AAAAAAAAAUGH!

The first step for this project is to design the main character which is a fairy. The fairy comes into town and makes a lot of changes. I was given no direction for designing the fairy, so I went to Google Images to see what fairies look like. I liked the pixie-like fairies with the little dresses that look like flower petals. After doodling a page or two of sketches I landed on the above sketch and sent it off for approval.

Now here is what seems to happen often in the wide world of freelance illustration. The client had no idea of what they wanted until they saw my sketch... THEN they know what they want, and this ain't it! NOW they give me some specific directions. Make the fairy older and hipper, with a beehive hairdo and a tiera, and go-go boots. OK... I can do that.

This really isn't a big problem... it is just that it would be much quicker if I knew what they were looking for before I began. Anyhoo, here is the revised fairy sketch. It was approved and I am working on the sketches for the book. Stay tuned!