When I took on the assignment of illustrating 3 books at the same time, I vastly underestimated the amount of work that was going to be. OY! So for the last month I have been working 12 hour days (8am-8pm) including weekends. OY, OY!
But the good news is, it is now finished! WOOT! While I am catching my breath, I will complete the process for you.

This is the scan of my inked page. It is scanned in at 300 dpi and 100% actual size.

Here is a detail shot of the mom and baby guppy. You can see my wobbly line work and see that all lines are touching... no gaps anywhere. This is important for me in quickly applying the color. Shapes that are not enclosed can be closed up and colored later, but it takes more time... and time is a very valuable thing on this project.

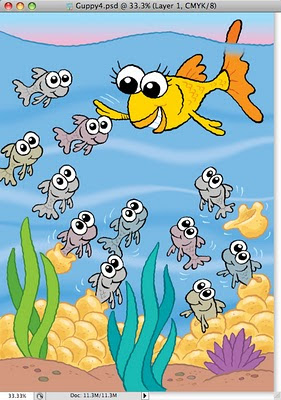
So, here we are. The finished illustration. The client always wants lots of bright colors for younger kids. So I stick to clean, bright colors and dump them in with the paintbucket in Photoshop. Bam, Bam, Bam! It is so quick. If I had to "paint" in all of the colors it would probably double the amount of time it would take to color these... and I don't have that time.
Once I have applied the flat colors I go back and do some actual painting. Like on the eggs. I think if I do a little bit of this here and there It helps add some variety and keeps everything from being so flat looking. I selected the blue of the water and ran a paint brush through it to give some variety there too. "A little dab will do ya" is my thinking. I don't like illustrations where everything has that airbrushed look, but a bit of softness here and there helps. I also change the black line to color on some things which makes the black lines on the main characters pop out more.
If you are interested in the nitty gritty of how I color in Photoshop, just go over to my sidebar and under LABELS click on Photoshop tutorial. This is a step by step of how I do it. I have a newer version of Photoshop now but the process is basically the same.
Well, that's it! I am glad to finally get this project and my blogging about it all wrapped up.
Oh... and I changed the title on this blog. Did you notice? What do you think of the new improved header?
