

When an area is selected you see the "marching ants" crawling around the edge of the selection. To get rid of the ants, hit the Command+H keys. Think "H" for Hide. Now them ants are gone. GONE! They can be distracting sometimes.
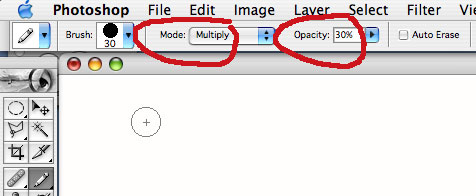
Grab the pencil tool and put the Mode on Multiply and the Opacity to around 30%.
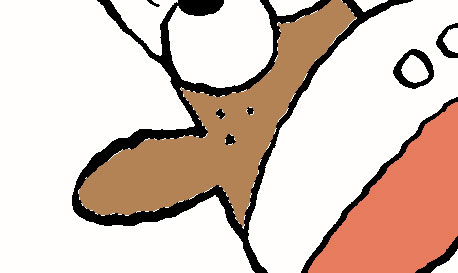
Hold the pencil tool over the brown color and hold down the Option key (you should get the eye dropper) and click on the brown color. This samples the color and now it is ready to use. I have made two passes along the edge of the ear. The first pass darkens the color 30%. The second pass darkens it another 30%. I am using the mouse here. If you have a Wacom tablet you can go to town, building up a painterly looking form.

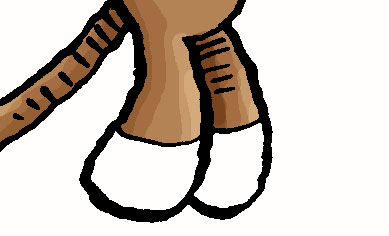
Now we will lighten some areas. Go back to the pencil and change the Mode to Screen and leave the Opacity at 30%.

You can see where I used the Screen mode on the legs. Again, one pass lightened the color and the second pass lightened it even more. 30% may not be quite enough. I find that it is better to use a small amount and work up to the amount of light and dark you want. This is something you can play around with and see what works for you.
Now you need to Deselect everything. That is done with Command+D (Deselect). Click on the Wand again and then click the Contiguous box. When you do this, the Wand only selects the shape you have clicked on. I want to select the white in the mouth. If I don't click the Contiguous box, the Wand woud select the background and everything else white.

OK, now I have the white in the mouth selected and I want to add the red part. To do this hold down the Shift key and click in the red area. Holding the Shift key ADDS another area to the selection. Remember... Command+H will hide those marching ants.
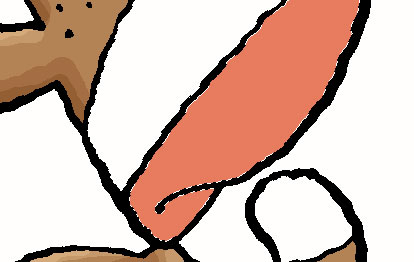
Using the pencil tool (on Multiply and 100%) I make a light blue color and apply it to the mouth. Multiply works like putting down a transparent wash. The blue colors the red but allows the red color to show through.

There we go! Flat color modified with the pencil. This adds a bit of form to the figure. I think the effect may be too subtle. You may want to tweak it up a bit.

But what about those black lines around everything? Let's get rid of some of them... take one giant leap to Part 5... the final episode.
1 comment:
Thanks for this tip! I've been wondering how I was going to make my flat cartoon character a bit more dimensional. I often forget about the humble (but awesome) painting tools.
I found that, for some reason, the 30% screen seems a lot more drastic than the 30% multiply. I found my highlights more closely "matched" my shadows with I halved the screen painting to 15%, but of course YMMV.
Thanks again, and I'm loving the effect it's giving.
Post a Comment