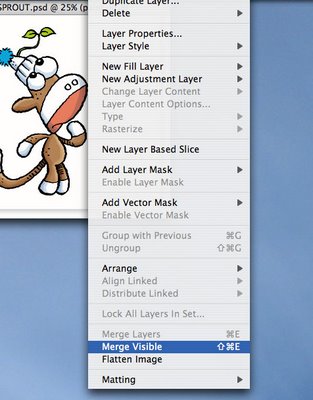
Here is the Merged layer.
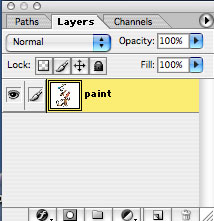
Now use the Wand and click on the black line. It selects ALL the black lines if the Contiguous box is unchecked. Don't like those ants? You know how to get rid of them now.

I have now used the pencil tool again. Make sure the tool is set back to Mode: Normal and 100% Opacity. I sampled the green color and darkened it a bit with some black. Then you just pencil over the black lines and color them. I did the same to the fuzzy ball on top of the hat. This is handy for coloring words or something like clouds that have a black outline around them. If you used the sky color and painted out the outlines, you would be left with just white clouds against the blue sky. Cool, eh?

OK... I'm running out of time, so this is the finished image. Here is a recap of what I did to the background. I filled the background with a yellow color. I selected all the yellow with the Wand and then used the soft brush with white and clicked on a spot right behind the sprout. Deselect. Don't forget to deselect things. Sometimes nothing seems to work and I realize that I have something selected. I had forgotted because I like to Hide those marching ants, doncha know. OK, I now selected the rectangle at the bottom with the rectangle selection tool and filled it with a green color. I selected another oval shape and darkened it for a shadow. Then just for kicks, I used the Burn tool around the edges. Now if you are using this on the WEB, go to Image>Image Size and change the resolution to 72dpi and I always use the File>Save for the Web to save a jpeg.
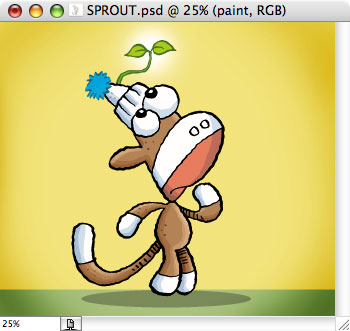
Whew! That's it! I hope this will help someone make the transition to digital color. It may look scary, but it is really not. Once you get the hang of it, it is so easy to do. If this has helped you, or if you think it may help someone else, feel free to link to it. JONESAPALOOZA doesn't get that many visitors, so you are welcome to link to this and help spread the info.
Happy coloring!

4 comments:
What a nice tutorial, Doug! It's fun to see how you work and use PS/AI for your work. Have you tried doing the initial rough and then the ink drawing on computer yet? That might be fun to try out. And an excellent solution for "sprout", too!
PS--I tried to comment here yesterday, but the comment window wouldn't load. Just so ya know... : )
nope, I have not tried drawing on the computer yet. I still like the feel and control of my pen and paper. I may give the digital drawing a shot at some point, though... who knows?
Thanks for coming back to comment. Sometimes Blogger gets wonky on us... it's outta my control... but it IS free... so I can't complain too much : )
Thank you, thank you, thank you! I've been trying on my own to figure out all the nuances to digital drawing/painting/WHATEVER and have had no luck. Thanks for providing me with a step by step way to get the look I need. :)
Thanks for the great tutorial! I think your drawings are fantastic, I love your sock monkey.
Post a Comment